This page provides step-by-step examples to practical use of the Bloch Simulator made for visualizing basic and advanced Magnetic Resonance techniques. The examples are spin-echo formation and the excitation process, which are also demonstrated in corresponding YouTube videos. The basic MR knowledge needed to understand the text below is described in an MRI tutorial targeted at a broad audience.
- It is easiest to run the simulator directly in an internet browser. If you have not already started it, please do so by following this link starting the software in a new browser window: https://www.drcmr.dk/BlochSimulator
- If you have Flash installed on your computer, you should now see the magnetization vector of an imaginary sample precessing in a magnetic field, B0, pointing upwards. You can always get back to this situation by choosing "Scene: Precession" in the pull-down menu on the lower left.
- First try to adjust the B0 field strength by moving the slider named "B0". Notice how the precession frequency changes with the field. Think of the units as tesla, for example.
Spin-echo demonstration, step by step:

The spin echo sequence
- Now, let's introduce field inhomogeneity so that all nuclei do not precess at the same frequency. This can be done by choosing "Scene: Weak inhomogeneity" in the pull-down menu on the lower left. You now see the magnetization in thermal equilibrium. The floor rotates since you see this in the rotating frame of resonance which is only needed later. Therefore, shift back to the stationary frame by pressing the "Change frame"-button.
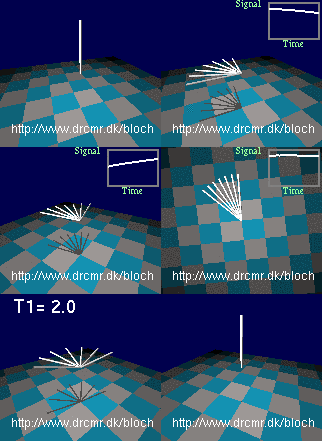
- Since weak inhomogeneity was selected above, the nuclei precess at different frequencies, but it does not show until the magnetization is rotated into the transversal plane. Do this by pressing the "90x hard" button (initiates 90 degree RF pulse rotating the magnetization quickly around the x-axis in the transversal plane). You should now see different components of the magnetization precessing at slightly different frequencies. Gradual dephasing leads to a loss of signal seen in the lower right graph. Press the "v" key on keyboard a few times - it toggles the viewing angle.
- You may want to repeat the last few steps by pressing the "Scene: Weak inhomogeneity" button again and doing a new excitation. Proceed when you understand what you are seeing so far. Let's add a short 180 degree refocusing pulse to our sequence after some dephasing has occurred (press the "180y hard"-button). This will lead to the formation of a spin-echo after a period equal to the dephasing period. Notice how the nuclei get back in phase and how the lost signal is recovered.
- This finishes the spin-echo demonstration, but you can continue experimenting with it, e.g. by playing out extra refocusing pulses or by adding a bit of relaxation using the T2-slider for example (choose a large value for T2 initially, e.g. 20 seconds). You can also watch the events in the rotating frame of resonance.
Off- and on-resonance excitation, step by step:
- Go back to the initial situation by choosing "Scene: Precession" in the pull-down menu on the lower left.
- Adjust the B0 field strength by moving the slider named "B0". Notice how the precession frequency changes with the field. Set the value of B0 back to 3 by typing the value in the text field above the slider, followed by "enter". Think of the units as tesla, for example.
-
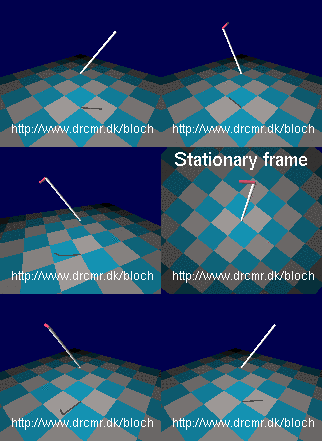
Now turn on a radio wave field. Do this by setting the RF amplitude to 0.1 using the appropriate slider or by typing the value in the corresponding text field, followed by "enter". The units are the same as for the B0 field. The red bar shows the push of the radio waves on the magnetization (the torque). Notice how the push is orthogonal to the magnetization, and how it rotates.
 Radio waves applied off-resonance
- The push does not seem to have much of an effect on the magnetization. This is because the frequency of the radio waves is not matched to the Larmor frequency (the radiowaves are off-resonance). The reason for the missing effect may be easier to see in the rotating frame of reference. Press "Change frame" to toggle between viewing in the stationary and the rotating frames of reference as you wish. Notice how the magnetization is not pushed consistently by off-resonance radiowaves (in synchony with the precession). Therefore it just wiggles slightly in the radio wave field. Switch back to the stationary frame of reference.
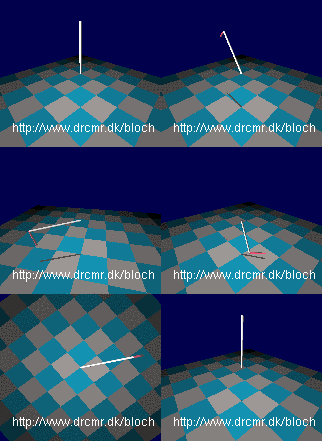
- Adjust the radio frequency to match the Larmor frequency simply by setting the RF frequency equal to B0 (3 in this case). This is valid since the gyromagnetic ratio in the simulator is set to 1 Hz/T (approximately). Hence the resonance frequency for a field of value 3 is simply 3. Notice how the magnetization is now gradually changed by the RF field. Watching this in the rotating frame makes it appear much simpler -- switch back and forth a few times, and notice how resonance radiowaves induces rotations in the rotating frame of reference.
-
Now you have seen how resonant radiowaves change the magnetization, and how off-resonant waves does not, lets start from equilibrium and do an excitation. Choose "Scene: Equilibrium". Add an RF field by setting the RF amplitude equal to 0.1. Notice how little happens since the RF frequency is not adjusted to the Larmor frequency. Adjust it as described above and see how the magnetization is rotated away from equilibirum, e.g. so it after a while points in the exact opposite directions. Similarly, on-resonance rotations away from equilibrium can be triggered by pressing the buttons labelled "90x hard", "90x selective", "180y hard" and "30x hard" that send bursts of radiowaves sufficiently long to cause the specified rotations.
 Radio waves applied on resonance
The simulator can do much more. A few examples are given in YouTube videos and on the project homepage but you really need to experiment yourself to get full benefit. The "Challenges" section in the "Help" menu may also be of inspiration.


